
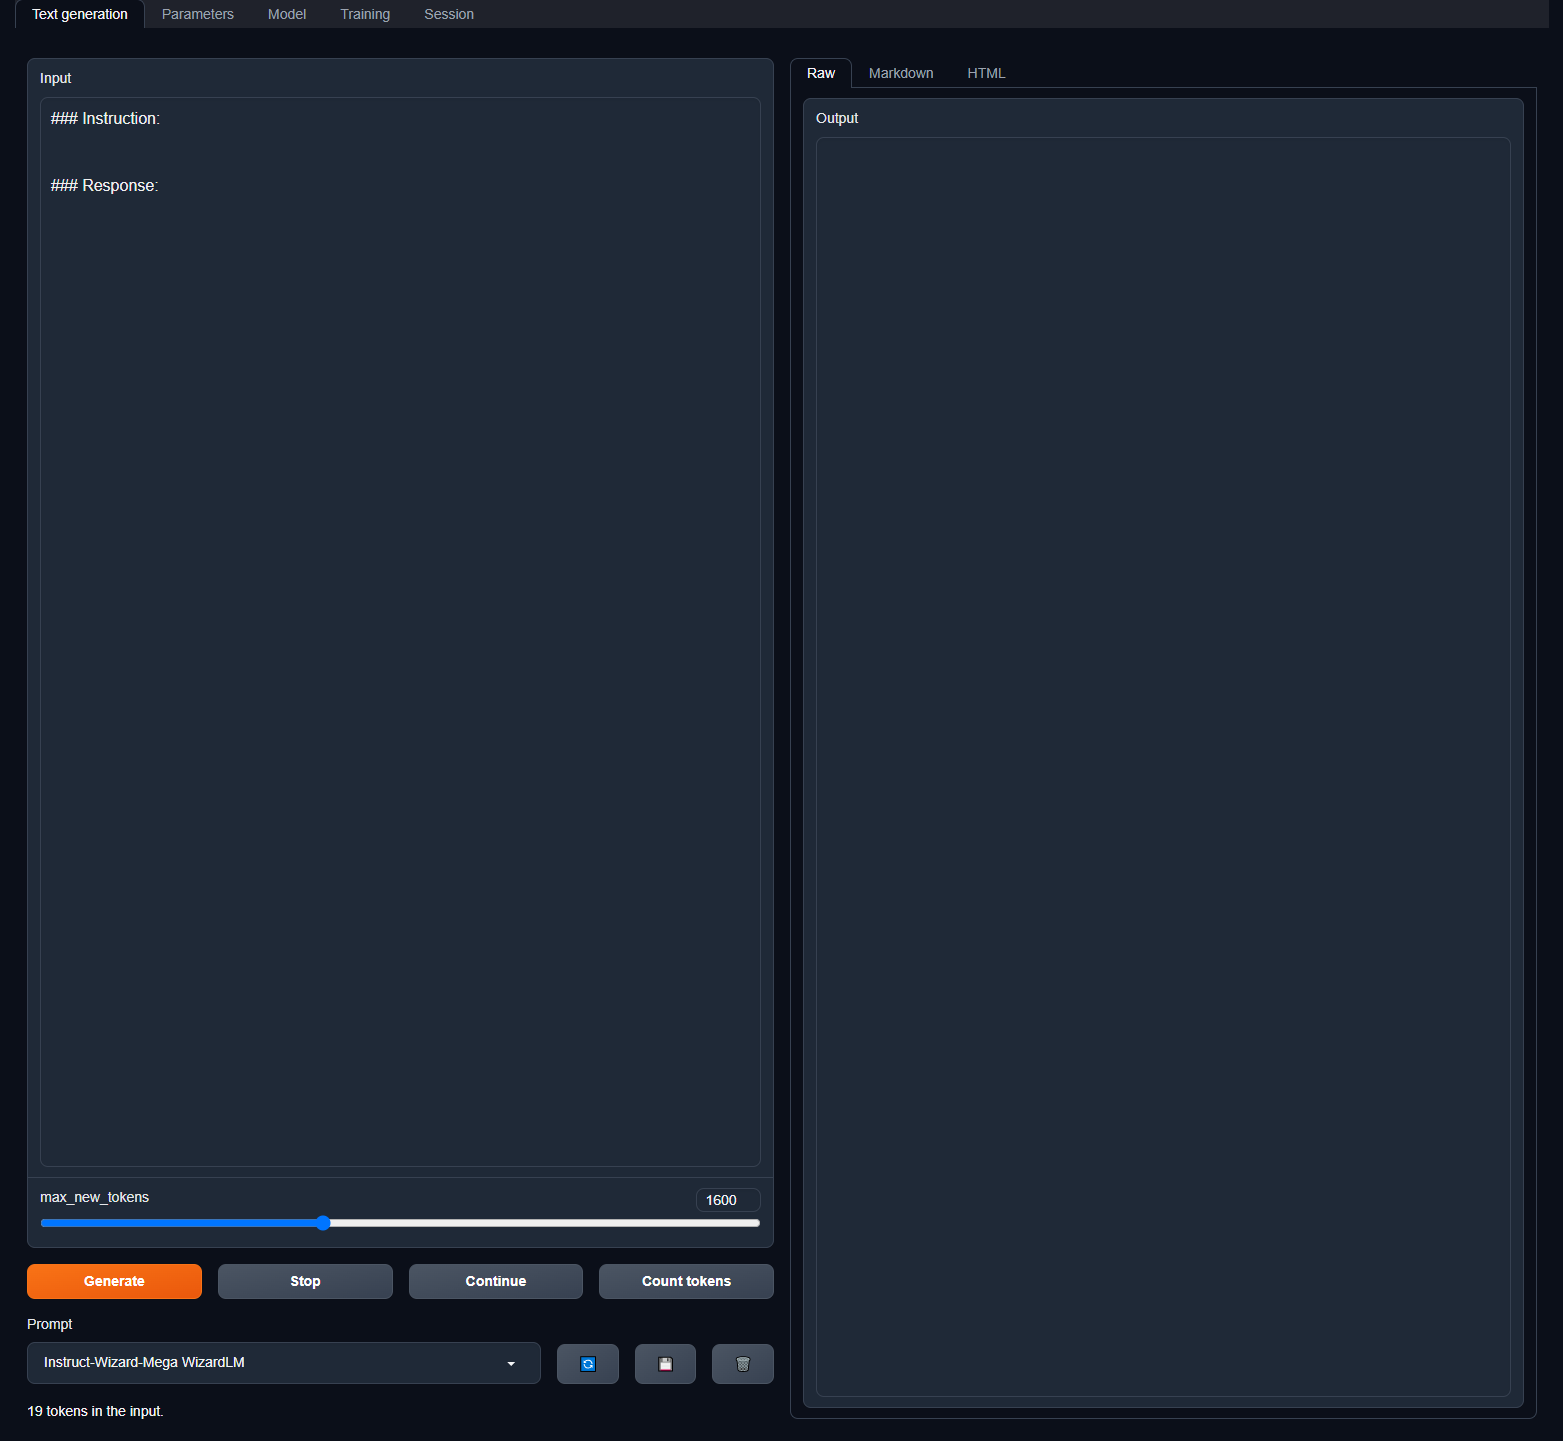
WizardCoder jest modelem lingwistycznym wytrenowanym na materiałach z różnych forów programistycznych.
Do obsługi modelu użyto, interfejsu dla modeli lingwistycznych opartego o bibliotekę Gradio.
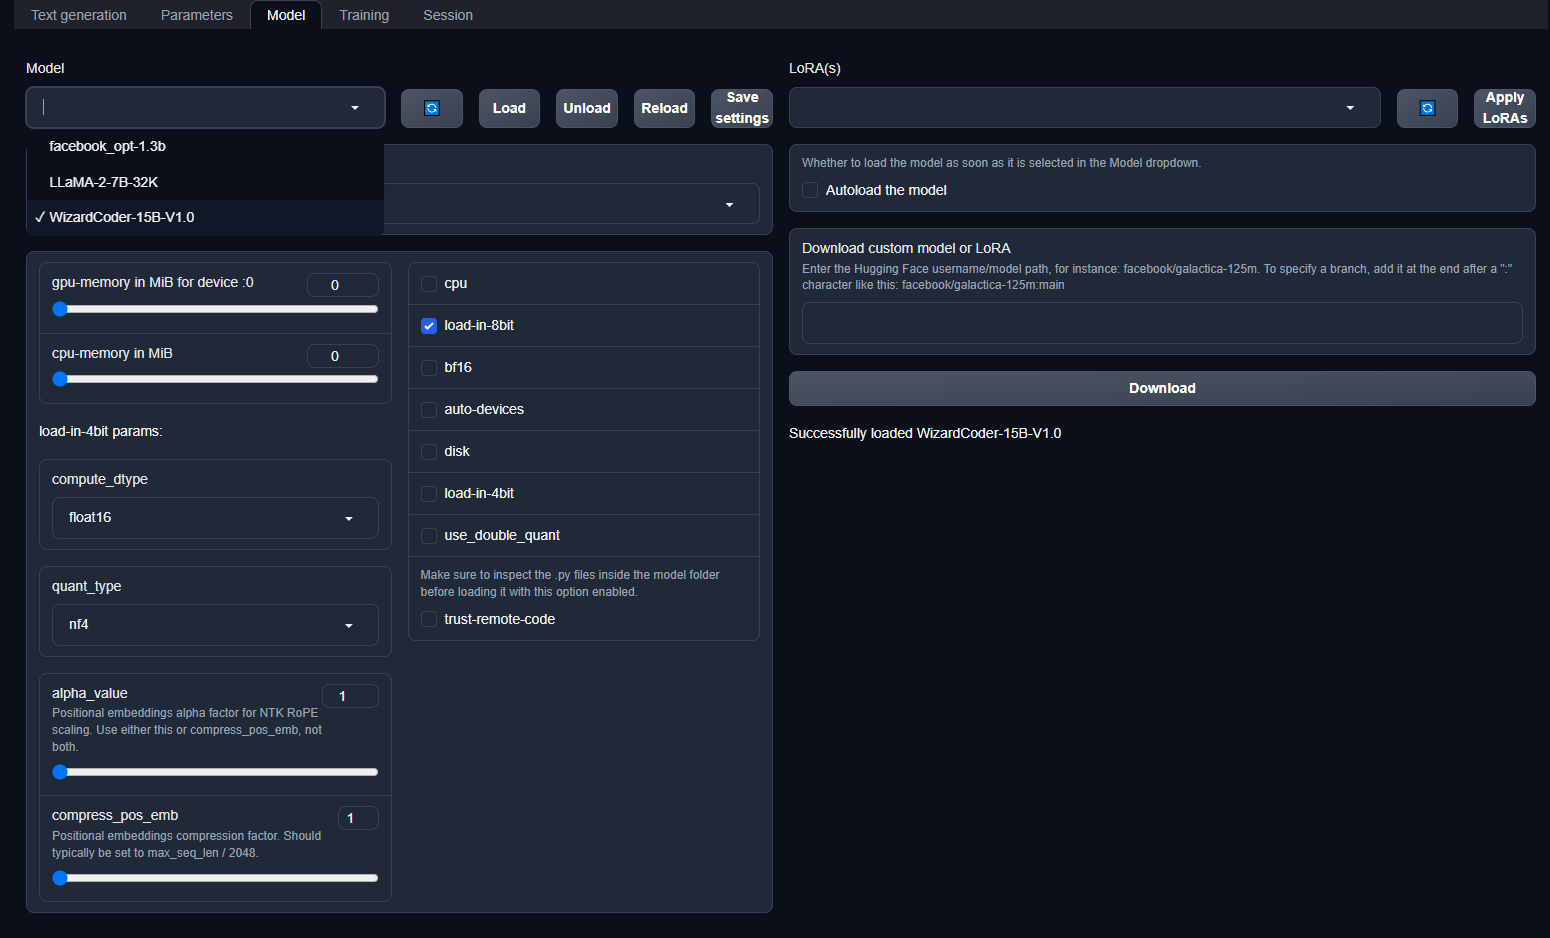
Sam model można ściągnąć z serwisu huggingface. Do testów użyto modelu opartego o 15 bilionów parametrów. Model zajmuje 30 GB przestrzeni dyskowej a po załadowaniu go do pamięci karty zużywa ~ 17 GB VRAM. Ładowanie modelu do pamięci karty trwało 176 sekund, w czasie ładowania zużyta została cała pamięć RAM tj. 32 GB a dysk SSD w szczycie pracował na pełnej prędkości tj. 1500 MB/s.
Do testów użyto ustawień MIROSTAT i szablonu dla promptu Instruct-Wizard-Mega który wygląda następująco:
### Instruction:
instrukcje wprowadzone przez użytkownika

### Response
odpowiedź modelu
Testy:
Podaj kod dla prostego kalkulatora w Pythonie:
### Instruction:
tell me code for simple calculator in python

### Response:Here is the Python code for a simple calculator with addition, subtraction, multiplication and division operations:
# Simple calculator program in Python
print("Enter operation (+,-,*,/)")
choice = input()
num1 = float(input("Enter first number: "))
num2 = float(input("Enter second number: "))
if choice == "+":
print("Result:", num1 + num2)
elif choice == "-":
print("Result:", num1 - num2)
elif choice == "*":
print("Result:", num1 * num2)
elif choice == "/":
print("Result:", num1 / num2)
else:
print("Invalid input")This program prompts the user to enter the operation (+,-,*,/) and two numbers, and then performs the operation accordingly. If the user enters an invalid operation
Podaj kod dla prostego kalkulatora w Javascript:
### Instruction:
tell me code for simple calculator in javascript

### Response:Sure! Here's an example of a basic calculator in JavaScript:
//Variables to hold the values entered by the user
var num1 = 0;
var num2 = 0;
//Function to add numbers
function add() {
return num1 + num2;
}
//Function to subtract numbers
function subtract() {
return num1 - num2;
}
//Function to multiply numbers
function multiply() {
return num1 * num2;
}
//Function to divide numbers
function divide() {
return num1 / num2;
}
//Function to display the result in the webpage
function displayResult(result) {
document.getElementById("result").innerHTML = result;
}
//Function to get the values entered by the user
function getValues() {
num1 = parseInt(document.getElementById("num1").value);
num2 = parseInt(document.getElementById("num2").value);
}
//Event listener to call the function to get the values entered
document.getElementById("submit").addEventListener("click", getValues);
//Event listener to call the function to add numbers
document.getElementById("add").addEventListener("click", function() {
displayResult(add());
});
//Event listener to call the function to subtract numbers
document.getElementById("subtract").addEventListener("click", function() {
displayResult(subtract());
});
//Event listener to call the function to multiply numbers
document.getElementById("multiply").addEventListener("click", function() {
displayResult(multiply());
});
//Event listener to call the function to divide numbers
document.getElementById("divide").addEventListener("click", function() {
displayResult(divide());
});
//Adding the HTML elements to the webpage
document.write("<form><input type='number' id='num1'><input type='number' id='num2'><input type='submit' id='submit'></form>");
document.write("<button id='add'>Add</button>");
document.write("<button id='subtract'>Subtract</button>");
document.write("<button id='multiply'>Multiply</button>");
document.write("<button id='divide'>Divide</button>");
document.write("<p id='result'></p>");In this example, we created four functions to perform the basic arithmetic operations. We then added event listeners to each button, which call the appropriate function to perform the calculation and display the result in the webpage. We also added two event listeners to the „submit” button, which call a function to get the values entered by the user.
Podaj kod na CRUD dla frameworka Codeigniter.
Instruction:
tell me code for simple crud for codeigniter framework
Response:
To perform CRUD (Create, Read, Update, Delete) operations in Codeigniter framework, we need to have a good understanding of the following concepts:
- MVC (Model-View-Controller) Architecture
- Forms Validation
- Database Connection
- Model (Handling database queries)
- View (Creating and displaying data to the user)
- Controller (Receiving input from the user, passing data between models and views, and redirecting users to the appropriate view based on user input)
Let’s dive into each concept in detail.
MVC Architecture
The MVC (Model-View-Controller) architecture separates the application’s logic (Model) from the user interface (View), and represents the user actions (Controller) by way of a process divided into three main parts:
- Model: It is responsible for handling the data and business logic of the application. In the MVC architecture, the Model represents the state of the application.
- View: It is responsible for displaying the data to the user. Views can be static or dynamic, depending on the needs of the application. The view is rendered on the user’s browser and displays the data to them in a user-friendly way.
- Controller: It is responsible for handling the user’s actions and interactions with the application. It receives input from the user, passes it to the appropriate model and view, and renders the appropriate view to the user.
Forms Validation
Forms validation is the process of ensuring that the data entered by the user is valid and consistent with the requirements of the application. It helps to prevent errors and inconsistency in the data, which can lead to incorrect or incomplete data processing or data security issues.
In Codeigniter, we use libraries like Form_validation and Validation to validate forms. These libraries help to check if the form fields have been filled correctly, if the data entered in them is in the right format, and if the values entered are not already used in the database or any other validation logic.
Here’s an example of validating a user’s login details using the Codeigniter’s Form_validation library:
<?php
defined('BASEPATH') OR exit('No direct script access allowed');

class Login extends CI_Controller {
  public function index() {
    $this->load->view('login');
  }

  public function login() {
    $this->load->library('form_validation');

    $this->form_validation->set_rules('email', 'Email','required', ['required' => 'Please enter your email']);
    $this->form_validation->set_rules('password', 'Password','required', ['required' => 'Please enter your password']);

    if ($this->form_validation->run() == FALSE) {
      //Re-load the login page with validation errors
      $this->load->view('login');
    } else {
      //Process the login action
      $email = $this->input->post('email');
      $password = $this->input->post('password');

      //Check if user exists in the database
      $this->load->model('user_model');
      $user = $this->user_model->get_user_by_email($email);

      if ($user && $password == $user->password) {
        //User credentials are valid
        //Do the login action here
        redirect('dashboard');
      } else {
        //Invalid credentials, re-load the login page with validation errors
        $this->load->view('login', ['error' => 'Invalid email or password']);
      }
    }
  }
}
Database Connection
To connect to the database, we first need to load the database library, and then connect to the database using the connection credentials specified in the database configuration file. Here’s an example:
<?php
defined('BASEPATH') OR exit('No direct script access allowed');

class Users extends CI_Controller {
  public function __construct() {
    parent::__construct();

    //Load database library
    $this->load->database();

    //Connect to the database
    $this->db = $this->database->conn_id;
  }

  public function add_user() {
    //Insert user data into the database
    $name = $this->input->post('name');
    $email = $this->input->post('email');
    $sql = "INSERT INTO users (name, email) VALUES ('$name', '$email')";
    mysqli_query($this->db, $sql);
  }
}
Model
The Model is responsible for handling the database queries and return the results to the controller. In Codeigniter, the database queries are executed using mysqli_query() and mysqli_fetch_assoc() functions. Here’s an example of a User Model in Codeigniter:
<?php
class User_model extends CI_Model {
  public function get_users() {
    $sql = "SELECT * FROM users";
    $result = mysqli_query($this->db, $sql);
    $users = array();

    while ($row = mysqli_fetch_assoc($result)) {
      $users[] = $row;
    }

    return $users;
  }
}
View
The Views display the data to the user and usually include HTML, CSS, and JavaScript. Views can also include PHP code for conditional statements and loops, making them fully dynamic and flexible. Here’s an example of a user view in Codeigniter:
    <h1>Users</h1>
    <table>
        <tr>
            <th>ID</th>
            <th>Name</th>
            <th>Email</th>
        </tr>
        <?php foreach ($users as $user) :?>
            <tr>
                <td><?php echo $user['id'];?></td>
                <td><?php echo $user['name'];?></td>
                <td><?php echo $user['email'];?></td>
            </tr>
        <?php endforeach;?>
    </table>
Controller
The Controller is responsible for receiving input from the user and passing it to the appropriate model and view. It also receives the output from the view and displays it to the user. In Codeigniter, the redirection action is handled using the redirect() function, which redirects the user to the specified URL. Finally, the controller can also load other views and pass data to them using the view() function. Here’s an example of a User Controller in Codeigniter:
<?php
defined('BASEPATH') OR exit('No direct script access allowed');

class Users extends CI_Controller {
  public function __construct() {
    parent::__construct();

    //Load user model
    $this->load->model('user_model');
  }

  public function index() {
    //Get all users from the database
    $users = $this->user_model->get_users();

    //Load user view and pass users as data
    $this->load->view('users', ['users' => $users]);
  }

  public function add() {
    //Add a new user to the database
    $name = $this->input->post('name');
    $email = $this->input->post('email');

    $this->user_model->add_user($name, $email);

    redirect('users');
  }
}
Podaj kod na CRUD dla Django:
Instruction:
tell me code for simple crud for python django
Response:
Sure, the simplest way to do CRUD operations in Python Django is to use Django’s built-in User model. Here’s an example of how to create a simple CRUD for users:
Step 1: Create a new Django project with the manage.py file:
django-admin startproject projectnameStep 2: Navigate to the project directory and create a new app:
python manage.py startapp appnameStep 3: Open the app’s urls.py file and add the following imports:
from django.urls import path
from django.contrib.auth import views as auth_views
from.views import UserListView, UserCreateView
Step 4: Define the URLs for the app:
urlpatterns = [
    path('users/', UserListView.as_view(), name='user_list'),
    path('register/', UserCreateView.as_view(), name='register'),
    path('login/', auth_views.LoginView.as_view(template_name='login.html'), name='login'),
    path('logout/', auth_views.LogoutView.as_view(template_name='logout.html'), name='logout'),
]
Step 5: Create a custom User model in the app’s models.py file:
from django.db import models
from django.contrib.auth.models import AbstractUser

class CustomUser(AbstractUser):
    pass
Step 6: Create a CustomUserAdmin class in the app’s admin.py file:
from django.contrib import admin
from.models import CustomUser

class CustomUserAdmin(admin.ModelAdmin):
    list_display = ('username', 'email', 'is_staff')

admin.site.register(CustomUser, CustomUserAdmin)
Step 7: Create a UserListView class in the app’s views.py file:
from django.contrib.auth.mixins import LoginRequiredMixin
from django.shortcuts import render
from django.urls import reverse_lazy
from django.views.generic import ListView, CreateView, UpdateView, DeleteView
from django.contrib.auth.decorators import login_required
from django.contrib import messages

from.models import CustomUser

class UserListView(LoginRequiredMixin, ListView):
    model = CustomUser
    paginate_by = 20
    context_object_name = 'users'
    template_name = 'users/user_list.html'

class UserCreateView(CreateView):
    model = CustomUser
    template_name = 'users/register.html'
    success_url = reverse_lazy('user_list')

class UserUpdateView(LoginRequiredMixin, UpdateView):
    model = CustomUser
    fields = ['username', 'email', 'password']
    template_name = 'users/edit.html'
    success_url = reverse_lazy('user_list')

class UserDeleteView(LoginRequiredMixin, DeleteView):
    model = CustomUser
    template_name = 'users/delete.html'
    success_url = reverse_lazy('user_list')
Step 8: Create the necessary HTML files to display the CRUD views:
users/user_list.html:
{% extends 'base.html' %}

{% block content %}
<div class="container mt-5">
    <h1>User List</h1>
    <table class="table">
        <thead>
            <tr>
                <th>Username</th>
                <th>Email</th>
                <th>Activate</th>
                <th>Edit</th>
                <th>Delete</th>
            </tr>
        </thead>
        <tbody>
            {% for user in users %}
            <tr>
                <td>{{ user.username }}</td>
                <td>{{ user.email }}</td>
                <td><a href="{% url 'activate_user' pk=user.pk %}">Activate</a></td>
                <td><a href="{% url 'edit_user' pk=user.pk %}">Edit</a></td>
                <td><a href="{% url 'delete_user' pk=user.pk %}">Delete</a></td>
            </tr>
            {% endfor %}
        </tbody>
    </table>
</div>
{% endblock %}
users/register.html:
{% extends 'base.html' %}

{% block content %}
<div class="container mt-5">
    <h1>Register</h1>
    <form method="POST">
        {% csrf_token %}
        {{ form.as_p }}
        <button type="submit" class="btn btn-primary">Register</button>
    </form>
</div>
{% endblock %}
users/edit.html:
{% extends 'base.html' %}

{% block content %}
<div class="container mt-5">
    <h1>Edit User</h1>
    <form method="POST">
        {% csrf_token %}
        {{ form.as_p }}
        <button type="submit" class="btn btn-primary">Edit</button>
    </form>
</div>
{% endblock %}
users/delete.html:
{% extends 'base.html' %}

{% block content %}
<div class="container mt-5">
    <h1>Delete User</h1>
    <p>Are you sure you want to delete this user?</p>
    <form method="POST">
        {% csrf_token %}
        <button type="submit" class="btn btn-danger">Delete</button>
    </form>
</div>
{% endblock %}
Step 9: Add login/logout views:
Open the app’s views.py file and add the following imports:
from django.urls import reverse_lazy
from django.views.generic import ListView
from django.contrib.auth.views import LoginView, LogoutView

from.models import CustomUser
Then define the following views:
class CustomLoginView(LoginView):
    template_name = 'login.html'
    authentication_form = CustomAuthenticationForm
    success_url = reverse_lazy('user_list')

class CustomLogoutView(LogoutView):
    template_name = 'logout.html'
    next_page=reverse_lazy('user_list')

class NoLoginView(ListView):
    template_name = 'no_login.html'
    model = CustomUser
    context_object_name = 'users'

    @method_decorator(login_required)
    def dispatch(self, request, *args, **kwargs):
        return super().dispatch(request, *args, **kwargs)
Then add the following URLs:
urlpatterns = [
    path('users/', UserListView.as_view(), name='user_list'),
    path('register/', UserCreateView.as_view(), name='register'),
    path('edit/<int:pk>/', UserUpdateView.as_view(), name='edit_user'),
    path('delete/<int:pk>/', UserDeleteView.as_view(), name='delete_user'),
    path('login/', CustomLoginView.as_view(), name='login'),
    path('logout/', CustomLogoutView.as_view(), name='logout'),
    path('no_login/', NoLoginView.as_view(), name='no_login')
]
Finally, create the necessary HTML files:
login.html:
{% extends 'base.html' %}

{% block content %}
<div class="container mt-5">
    <h1>Login</h1>
    <form method="POST">
        {% csrf_token %}
        {{ form.as_p }}
        <button type="submit" class="btn btn-primary">Login</button>
    </form>
</div>
{% endblock %}
logout.html:
{% extends 'base.html' %}

{% block content %}
<p>You have been logged out.</p>
{% endblock %}
no_login.html:
{% extends 'base.html' %}

{% block content %}
<p>You must be logged in to see this page.</p>
{% endblock %}
That’s it! Now you can create, edit, and delete users. You can also restrict access to certain views with the @login_required decorator.
Podaj komendy na skonfigurowanie OSPF na routerach Cisco.
Instruction:
tell me commands for configuring ospf on cisco routers
Response:
There are different ways to configure ospf on Cisco routers depending on the router model:
- Cisco IOS routers: Use the
crypto keycommand to generate the OSPFv3 authentication password and use therouter ospfcommand to define the OSPF instance and the routing interfaces:
crypto key generate ospfv3 md5 authentication-key
router ospf 1
network 192.168.1.0 0.0.0.255 area 0- Cisco NX-OS and ASA routers: Use the
key <algo> <key-number> secret <password>command to generate the OSPFv3 authentication password and use therouter ospfcommand to define the OSPF instance and the routing interfaces:
keychains
  key 7 ospfv3 authentication-key md5 test-password
router ospf 1
  stub default-cost 100 metric 1
interface Ethernet1/1
  ip ospf transmit-delay 100
  ip ospf network point-to-point
  ip ospf authentication key-id 7 area 0.0.0.0
ip ospf hello-interval 4- Cisco Nexus and IOS-XR routers: Use the
key chaincommand with OSPFv3 encryption and authentication to generate the OSPFv3 authentication password and use therouter ospfcommand to define the OSPF instance and the routing interfaces:
key chain ospfv3
  key 1 md5 test-password
router ospf 1 vrf vrf1
  network 192.168.1.0/24 area 0
In all cases, you need to replace test-password with a strong password that is at least 8 characters long. The generated password can be viewed with the show run | sec key command, and can be changed with the clear key or key commands.
Podaj komendy do skonfigurowania statycznej trasy dla routera Cisco
Instruction:
tell me CLI commands for configuring static route on Cisco router
Response:
Configuration of Static Routes on Cisco router
R1(config)#ip route 192.168.127.12 255.255.255.255 GigabitEthernet 0/1
R1(config)#exit
In the above command, 192.168.127.12 is the destination IP address of static route.
GigabitEthernet 0/1 is the Ingress Interface towards the next hop router.
Podsumowanie i wnioski:
Pomimo tego jak sama nazwa wskazuje WizardCoder powinien być asystentem dla programistów, możliwe jest także uzyskanie odpowiedzi z innych zagadnień takich jak sieci komputerowe. Na niesprecywane pytania model odpowiada ogólnie podając podstawę teoretyczną i bardzo ogólny kod.
Dodaj komentarz